Making a traditional quill fishing float
Making a traditional quill fishing float
I love the old school style floats, onions, bobbers, quills and assorted wagglers each one hand made and unique so when I saw these flash up on my Facebook page I thought I would try to get the maker to do a little bit of a description on how they are made. I hope you like them as much a s I do! Many thanks go to angling author, Pat Regan for taking the time to go through the steps needed to make something individual.
For as long as I can remember I have been making my own fishing flies and floats. I sell quite a few also, mainly because I tend to get swamped out with them. I was recently approached by fellow angler, Lee Swords, and asked to give a few tips about making a traditional float, so here goes.
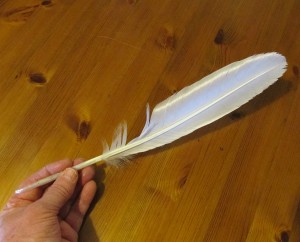
First select a nice healthy quill. In this case it is a mute swan feather. However, one can use goose, crow, gull, wood pigeon, etc for various purposes and different occasions.
I like to soak my feathers in a weak solution of disinfectant for a few hours. After doing this I dry them properly.
Next we need to remove the herl, which is the soft material. I do this with curved fly tying scissors, yet some makers prefer a sharp knife or razor blade.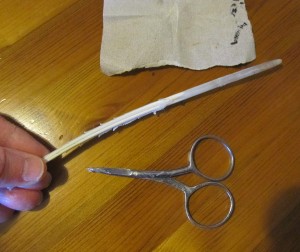
Now we want a nice wire eye. A simple loop is created by twisting an amount of wire around a bamboo skewer or similar-sized stick.
The whipping thread now secures the wire eye.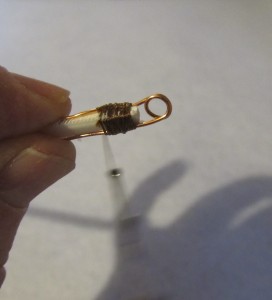
One can now continue with the thread all the way up the shaft of the quill, or alternatively use various colours to achieve a fancy effect. The thickness of your thread is dependent upon the size of the float and of the diameter of the wire.
Make sure you keep a firm but gentle pressure on the silk.
After the whipping is finished we just have to apply some ordinary nail varnish to seal the thread and help secure a nice even base.
I shall not go into raptures about the next phase of the process as all that is required is to paint and then varnish the tip of the masterpiece. I tend to start with base white enamel and after that dries I apply the colours.
The painting is the fun part and allows one to get in touch with the ‘Picasso’ inside. Finish off with several coats of tough varnish, such as the ones used by the yachting lads and ‘Hey presto’ – you have it sorted out…now go catch some fish!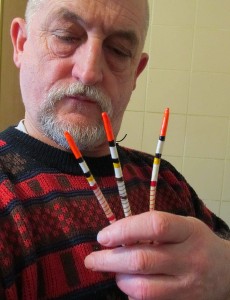
Yes, they sure do.
But if you would rather ‘buy’ them, rather than make them yourself, you can usually find a small selection here:
http://www.ebay.co.uk/sch/earlyolive/m.html?_nkw=&_armrs=1&_from=&_ipg=25&_trksid=p3686
NB. This article also appears on my blog:
http://pat-regan.blogspot.co.uk/2013/01/makinga-traditional-quill-fishing-float.html
More here:
http://dryflyfisher.yolasite.com/flies-and-floats.php
Pat Regan © 2013
Pat’s books include:
Fly Fishing on Wild Becks
http://www.amazon.co.uk/dp/1481250000/
UFO: The Search for Truth (2012, extended edition)
UK Paperback version:
US Paperback version:
Peter Swift and the Secret of Genounia
US Version:
UK version:
The New Pagan Handbook
http://thenewpaganhandbook.jigsy.com/
Dirty Politics


Hi, what knot do you use to tie of the whipping?
Thanks
Paul
I use a type of half hitch knot
Why not try making them from drinking straws, splitting one end and glueing the tip to a point?